

Christmas STL files can turn your 3D printer into a small holiday workshop. If you are planning gifts for Christmas 2026, late October and November are useful times to choose models, test your filament, and leave room for finishing. A thoughtful printed ornament or desk figure can feel personal without requiring a huge build or a complicated painting project.
This guide brings together seven Christmas 3D print ideas from the MY3DSTL catalog, plus a practical checklist for choosing files and preparing your print queue. These are digital models: you need a suitable 3D printer, materials, and slicing software to make the physical objects. Product images show the designs; your result depends on your printer, scale, material, and finishing.
Table of Contents
How to choose Christmas STL files for your printer
When selecting Christmas STL files, start with the recipient and the available time. A small ornament suits someone who decorates a tree, while a display figure makes more sense for a collector. A keychain is a compact option when you want a little extra inside a gift bag. Choose one design you can finish neatly before committing to a large batch.
Next, check the product description and file contents. Confirm the format, whether supports are included, and whether the model is divided into parts. Do not assume every Christmas STL file is support-free or ready to print with your existing profile. Open it in your slicer and inspect it at the size you actually intend to make.
For Christmas STL files used as hanging decorations, check the loop and overall weight. For figures, inspect the base and any delicate accessories. When resizing a model, thin details and clearances change too. A design that looks perfect on screen may need a larger scale to survive support removal or everyday handling.
7 Christmas STL files and festive print ideas
1. Cookie-inspired ornaments for a coordinated tree
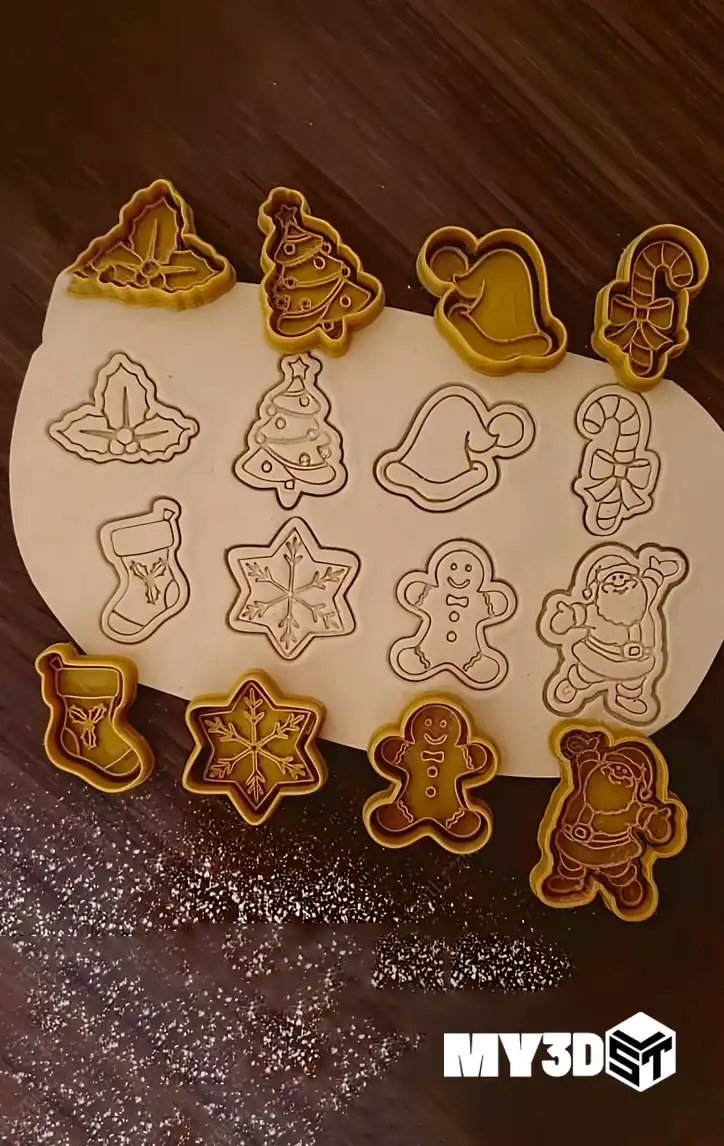
The Christmas cookie ornaments STL collection is a natural starting point for a traditional holiday theme. The product description includes familiar festive shapes such as gingerbread figures, snowflakes, candy canes, and stars. Use a limited color palette to make different shapes feel like one coordinated set.
For a simple finish, choose a warm base color and highlight raised details after printing. Test one ornament before filling the plate with copies. Check that the hanging loop remains open, remove sharp edges, and add a ribbon that does not put unnecessary force on the printed part. These are decorative cookie-inspired objects, not edible cookies or food-contact tools.
2. Pokémon ornaments for a fan-themed Christmas tree
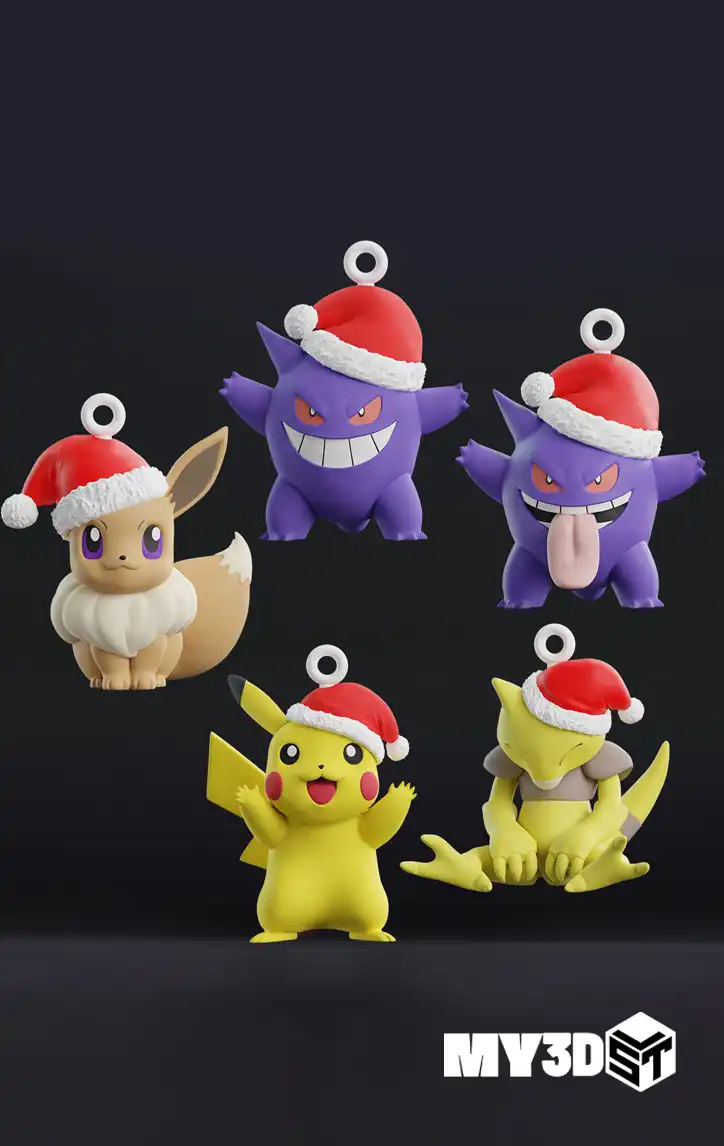
A themed decoration can be a good fit for someone who already collects a particular series. Explore the Pokémon Christmas Ornament STL model for a fan-focused branch of your holiday project. Look at the listing images and included designs before choosing your colors.
Instead of printing a whole tree’s worth immediately, make one sample and check its proportions alongside your existing decorations. Keep fragile details away from the points where ribbon or hooks apply pressure. A small box with a handwritten note can make a single well-finished ornament feel more considered than a large unfinished batch.
3. A snowman keychain as a compact winter gift
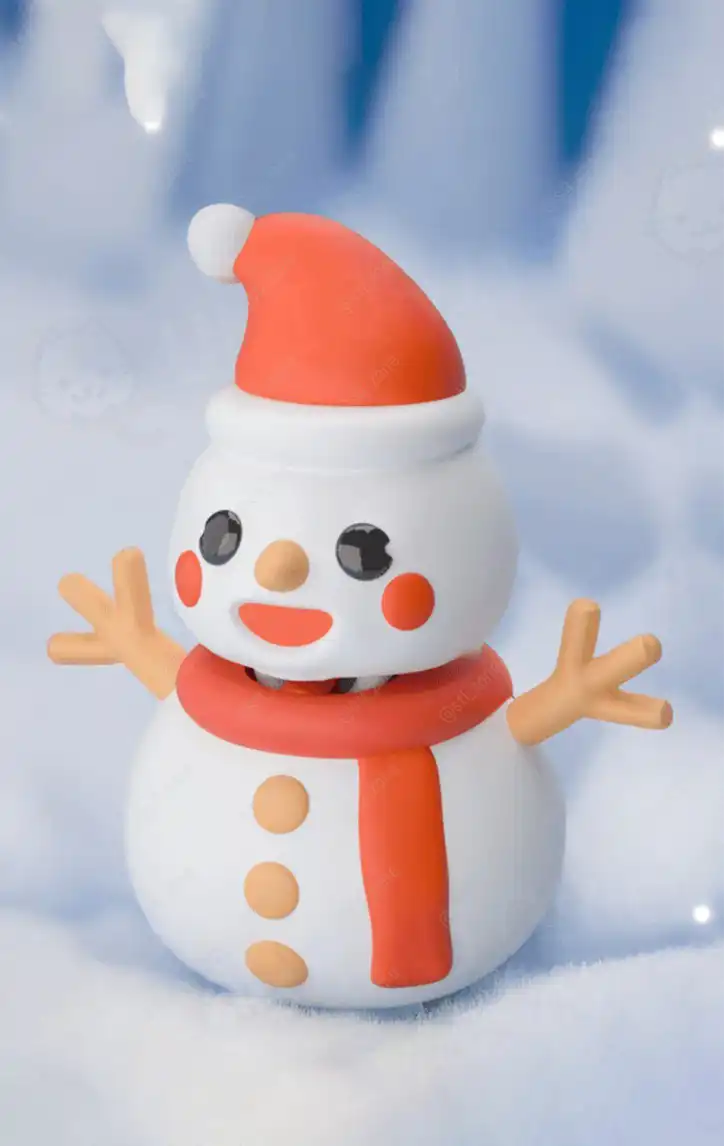
The Snowman Keychain STL works as inspiration for a modest winter gift or a gift-bag extra. Remember to budget for the separate key ring or connector. The digital download does not replace the hardware needed to turn a printed piece into a working keychain.
Pay attention to the attachment hole and layer orientation. A keychain experiences more handling than an ornament, so inspect the finished part for cracks and weak points before giving it away. Print at the intended scale and check that the connector fits without forcing it through the plastic.
4. A Santa Hat Minion for a cheerful desk display
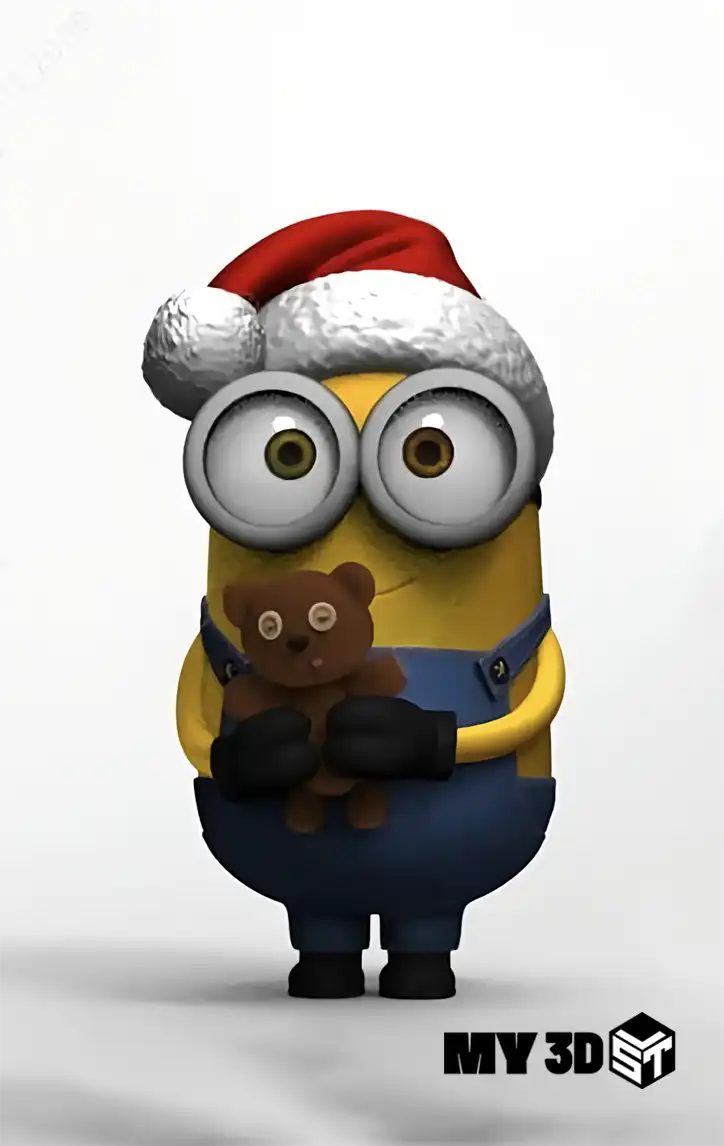
For a small seasonal display, consider the Santa Hat Minion STL model. This option is suited to a recipient who enjoys character figures and a playful desk decoration. Choose the final size based on the space where it will sit, rather than enlarging it simply to fill your build plate.
Plan the finishing before you print. If you intend to paint, leave enough time for preparation and drying between stages. If you prefer colored filament, inspect where color changes would occur in the slicer. A clean single-color display can also be effective when you do not have time for detailed painting.
5. Superhero helmet ornaments with a matching color theme
The Superhero Helmet Ornament collection offers another direction for a themed tree. Grouping a few helmet designs in consistent colors can create a deliberate display without needing an entirely new set of decorations.
Check the specific listing to understand which designs and parts are included. Small projections may be more vulnerable during support removal and storage. Store the finished ornaments separately, with a little padding, so they are ready to use again next year. Avoid scaling delicate pieces down until the details become too thin to print reliably.
6. Another helmet model for a collector’s gift set
If you want to compare styles, view the separate Helmet Superhero Marvel DC STL listing. Compare its images and contents with the ornament collection above before purchasing. Similar product names do not necessarily mean the same files, dimensions, or assembly requirements.
These Christmas STL files are a useful option when you are building a small coordinated collector gift. Select the model that best matches the recipient, then decide whether it belongs on a tree, a shelf, or in a display box based on its actual design. Do not add a hanging hole without checking whether the surrounding geometry can support it.
7. A Nightmare Before Christmas chibi display
The Nightmare Before Christmas chibi STL model bridges spooky and festive decorating. It can suit a collector who keeps character displays out beyond a single holiday. Review the listing images to decide whether the style fits your planned gift.
Give a detailed display model more room in your schedule than a flat ornament. Check part fit before final painting, and pack delicate pieces carefully. If you are choosing Christmas STL files for several people, reserve the more involved projects for the recipients who will appreciate the extra assembly and finishing work.
A practical checklist for printing Christmas STL files
- Inspect the model: check dimensions, part count, orientation, and thin areas in your slicer.
- Use a tested profile: start with the printer and material manufacturer’s recommendations, then adapt for the model.
- Preview every layer: look for unsupported islands, missing details, and unnecessary supports.
- Print a sample: validate the finish, fit, and hanging points before making copies.
- Check the estimate: include support material, failed tests, finishing supplies, and hardware in your budget.
- Finish safely: follow material handling guidance and keep small decorative parts away from young children.
There is no universal layer height, infill percentage, or print time for every ornament. Shape, nozzle size, printer, and chosen scale all matter. Use the slicer’s preview and estimate rather than assuming a small object will always be quick. Resin projects also need appropriate washing and curing according to the material manufacturer’s instructions.
For further seasonal inspiration, Prusa’s guide to 3D-printed Christmas cards shows how printed holiday greetings can complement a gift. Its card idea is a different project from the catalog models above, but it is a useful reminder that presentation can be personal too.
Plan your Christmas STL files before December
Use early November to shortlist Christmas STL files and make your first samples. Record the successful settings with each project. This makes it easier to repeat the same result later and avoids having to rediscover a working orientation when your schedule is busier.
After testing your Christmas STL files, use the rest of November to work through the longer prints and any models that need assembly or painting. Leave the smallest proven designs for the final batches. Reserve extra time for a clogged nozzle, a failed support, or a color you need to reorder. A realistic queue is more useful than an ambitious list you cannot finish.
After printing your Christmas STL files, inspect every finished gift before wrapping. Remove rough support marks, check part connections, and attach the appropriate ribbon or hardware. Include a short care note when an item is delicate. Keep plastic decorations away from open flames and heat sources, and avoid presenting decorative prints as certified toys.
Compare your Christmas 3D print options before buying
A quick comparison helps you choose between Christmas STL files without relying only on an attractive preview. Think about where the object will be used and what you can finish confidently. The following planning guide describes project types, not guaranteed specifications for every file.
| Project type | Best use | Check before printing | Extra supplies |
|---|---|---|---|
| Hanging ornament | Tree decoration or gift topper | Loop strength, weight, thin details | Ribbon or suitable hook |
| Winter keychain | Small practical gift | Attachment hole, layer direction, hardware fit | Key ring and connector |
| Character figure | Shelf or desk display | Supports, assembly, stable base | Optional paint and display packaging |
| Coordinated collection | Several matching decorations | Sample quality, repeated print time, storage | Consistent colors and individual wrapping |
Match the project to your available equipment
If you have only one filament color, choose a shape whose outline and surface detail still look appealing without additional colors. If you already paint miniatures, a character display may fit your skills better. The goal is to select a project that works with the equipment and materials you already understand.
Check the largest individual part against your build volume. A model split into several pieces can still include a base that is too large for your printer. Rotating the part may help it fit, but can also change support requirements and surface finish. Inspect the resulting layout instead of assuming the slicer’s automatic arrangement is ideal.
Keep a simple record for your Christmas STL files
For each successful test of your Christmas STL files, write down the model name, scale, material, profile, orientation, and any changes you made. Add a short note about support removal and fit. A photograph of the finished sample can help you compare later batches under the same lighting.
Keep the downloaded archive and any instructions organized by project. Preserve the original files, and save modified versions separately with a clear name. This makes it easier to return to the original dimensions if a resized part no longer fits or a hanging loop becomes too narrow.
Package the gift for the journey
Before wrapping a printed object, imagine how it will move inside the package. Give protruding details space, cushion delicate parts, and avoid tight ribbon around thin features. For a multi-part display, consider whether it is safer to transport the parts separately and provide simple assembly notes.
For ornaments, a reusable small box is useful after the holiday as well as on gift day. Label the box so the recipient can find the right decoration next year. This small preparation step protects the work you put into printing and makes the gift easier to keep.
Christmas STL files: frequently asked questions
Are these physical gifts or digital downloads?
The linked MY3DSTL products are digital 3D model downloads. You print and finish the physical objects yourself. Read each listing for the included files and requirements before ordering.
Which project should a beginner try first?
Start with a small, simple design whose geometry and requirements you understand. A flat ornament may be easier to inspect than a complex figure, but support needs still depend on the particular model. Make one sample before committing to multiple copies.
Can I sell prints made from these Christmas STL files?
Check the license and rights for each specific model before selling physical prints or using a design commercially. Buying a digital file does not automatically grant commercial rights or rights to third-party characters. Ask for clarification if the listing does not state the permission you need.
Do I need a multicolor printer?
Not necessarily. Depending on the design, you can use one color, paint the finished object, or print separate parts in different colors. Check the actual model structure and your printer’s capabilities before planning a color workflow.
How much does a printed gift cost?
Add the file cost to the slicer’s material estimate, then account for electricity, supports, test prints, paint, hardware, and packaging. Your actual cost varies with the machine, material, size, and number of successful prints.
Choose your first project from Christmas STL files
For a different kind of gift, our print in place STL files guide explains how to choose articulated animals and keychains with moving joints.
The most useful Christmas STL files are the ones you can print well and match to a real recipient. Start with one ornament, keychain, or display model, test the result, and build your holiday queue from there. Explore the linked MY3DSTL designs, compare the file details, and leave yourself time to finish each gift with care.
Troubleshoot a holiday sample before printing a batch
If the first layer does not stay attached, stop and check the build surface, calibration, and material profile before trying the whole plate again. Follow your printer manufacturer’s cleaning instructions. Changing several settings at once makes it harder to understand what solved the problem, so test one meaningful adjustment at a time.
If details disappear after slicing your Christmas STL files, compare the model’s smallest features with your nozzle and selected scale. Inspect the layer preview around the affected area. Increasing the scale may help, but remember that it also changes print time, material use, and the fit of any separate parts.
If assembled pieces do not fit, check that all parts were printed at matching scales before sanding or forcing them together. Test-fit gently and keep paint away from mating surfaces until you understand the clearance. For keychains and ornaments, test the actual connector or ribbon on the sample rather than judging the opening only from a screen image.
When a sample succeeds, repeat it once before launching a large batch of Christmas STL files. Consistency matters more than a single lucky result. Keep the successful settings, allow time to inspect each copy, and reduce the batch size if a failure would put the whole gift schedule at risk.
1 Comment
what accessories are compatible with iphone duo